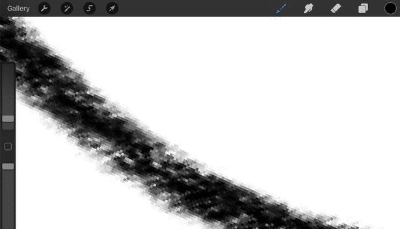
How to Draw Pictures Without Fuzzy Lines
This post may contain affiliate links
Procreate is a powerful and amazing drawing program, which I quickly became obsessed with once I started using it. As with any powerhouse program with a lot of great features, there's a lot to learn. Something that's really important to learn is how to avoid and fix blurry and pixelated lines when drawing with Procreate. This can be a frustrating problem that feels helpless. But, there are some easy fixes, as well as some things you can do from the get-go to avoid this pixelation problem to begin with.
Pixelation problems with Procreate are usually due to the canvas size being too small. For the least amount of pixelation, make your canvas as large you'll need for your final product. Procreate is a raster-based program, so if you zoom in too much, or your canvas is too small, you will always see some pixelation.
With the right steps, you can make sure that every Procreate image comes out crisp and clean instead of blurry and pixelated. Let's talk about how to get rid of this pixelation for good, and then why it happens in the first place. In this case, knowing why it happens helps with knowing how to fix it.
If you're interested in checking out some of the best digital drawing accessories to make drawing on your iPad easier, click here!
Fix Pixelation in Procreate By Increasing Canvas Size
A lot of the issues with pixelated Procreate designs comes from having canvas sizes that are too small. An easy fix is to create canvases that are aa big as possible without limiting the amount of layers that you need. Regardless, whenever you zoom in too much, you will always see pixelation.
When you create a new canvas, make it as big as possible. Depending on the storage on your iPad, the bigger your canvas, the fewer layers you will have.
So, you need to find a balance.
If you simply can't make your canvases big enough to limit pixelation while having enough layers to work with, you may want to invest in a new iPad with more RAM.
I have a complete guide on choosing the right canvas size for digital art that will help you pick the canvases you need depending on your project.

Your Procreate app will tell you the pixels of your screen when you create a canvas with their default screen size option, but in case you're curious and want to do it manually, here are the dimensions you're looking for:
- iPad Pro 12.9 inch: 2048×2732
- iPad Pro 10.5 inch: 2224×1668
- iPad Pro 9.7 inch, iPad Air 2, and iPad Mini 4: 1536×2048
At the very minimum, you'll want to create canvases that are the size of your screen.
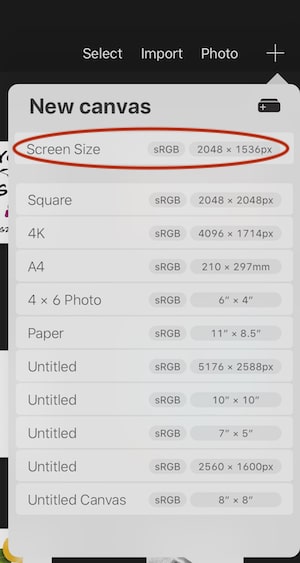
The smaller and smaller your canvas size gets, away from that screen size, the more pixelated your work will become.
Don't Resize Your Design
Think about what happens when you have a small image and you stretch it across a larger screen. It gets blurry and pixelated. That's what happens when you stretch your design. It was made at a smaller size and the pixels need to stretch out if the image becomes stretched out.
To have the best chance of avoiding pixelation, the largest canvas size possible and avoid resizing it.
If you're new to Procreate, I highly suggest reading my post about whether Procreate is worth it and a good tool for beginners. This post will give you a lot of info you'll want to know about this powerful design tool, especially as someone new to it.

Choose Your Interpolation Settings Carefully
When you resize objects with the Transform tool, choose either the Bilinear or Bicubic interpolation setting to prevent your lines from becoming pixelated as you resize them.
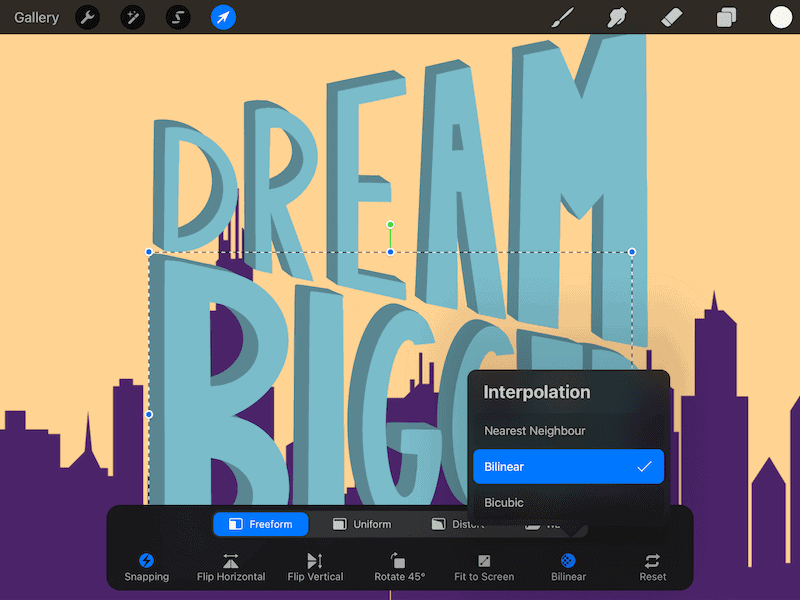
I have an in depth post about how these interpolation settings work and how they can impact the pixelation of your work as you resize your elements. Be sure to check that out for more info.
Important side note: If you want to learn how to master Procreate, I highly suggest checking out Skillshare. That's where I first learn how to use Procreate and their classes set a really strong foundation for me to build upon.
Skillshare is full of top-notch classes taught by professionals in the industry. Each class is concise, knowledge packed, and engaging. Honestly, learning Procreate would have been a LOT harder without Procreate.
Luckily, Skillshare wants to make sure it's cheap and easy to grow your art skills. Click here to get a trial of Skillshare absolutely free. You can learn a lot of amazing Procreate skills within two months that can set you off on a great Procreate journey.
Recommended Procreate Tools
These are my favorite Procreate tools that I wouldn't be able to live my Procreate life without!
- Skillshare:I take a LOT of Skillshare classes and they are the reason that I started using Procreate in the first place. These classes are amazing and you can take them for FREE! Click here to get a 30 day free trial of Skillshare
- Matte Screen Protector:these matte screen protectors will make your iPad screen feel more like traditional paper. Click here to find them on Amazon! Make sure to get the right size for your iPad model.
- Printful:it's SO rewarding to see your own art on a shirt, mug, sticker, poster, and so much more. Whether you want to start selling your art and sharing it with the world, or you just want a gift for yourself or a friend, having a great printer is important. Printful is my favorite print provider, offering a ton of high quality products to print your own art on. Check them out and sign up for a free account here!
Now let's get back to the article!
Fix Pixelation in Procreate By Changing Brushes
Procreate brushes vary in their graininess, flow, and saturation. If you're struggling with pixelation with your designs, try changing your brush to one that is smoother. A good choice would be to use a paint brush instead of a pencil brush or charcoal brush.
Brush choice doesn't matter as much as canvas size as far as pixelation is concerned, but it can help. If you're looking for more great Procreate brushes, check out my list of free Procreate calligraphy brushes and my list of Procreate blending brushes.

Procreate does an amazing job of replicating real life art tools in a digital form. Graphite pencil brushes in Procreate look a whole lot like real graphite pencils in real life. This is true of paints, pens, inks, and more. It's pretty neat.
But what it also means is that Procreate isn't going to use digital magic to compensate for the natural grainess of a pencil. You can do this on your own, which we'll talk about in the next section, but the pencil brush itself will look like the grainy pencil you know and love in physical form.
What's really neat about this is that you can create art with Procreate that looks like it was created in a traditional, not digital way. What isn't neat about it is that you might end up with some bumps and inconsistencies that you'll need to smooth out.
Does DPI Matter for Procreate?
DPI stands for dots per inch and is a reference to how close the ink dots are in an image when it is printed. It's important to have a DPI of at least 300 when printing work. DPI matters less for art that's designed for web use.
Many people want to blame DPI for their Procreate pixelation problems, but it's likely not the case. DPI only matters when you print an image. If you plan to print your Procreate design, DPI does matter and you should make sure it's set to at least 300.
But, DPI has little impact on the digital image you're looking at on your screen, so it's not the culprit of any pixelation issues.
How do I make Procreate lines smoother?
To make lines smoother with Procreate, choose a brush that has a more fluid stroke, increase the streamline slider in the settings of the brush you're using, or use the smudge tool to blend any ragged edges.
The first suggestion relates to what we've already talked about. Procreate works hard to ensure that their brushes look like real-life art materials. And, luckily, Procreate gives you a ton to choose from and they're really easy to switch between. If you feel like a brush isn't smooth enough, try another one.
Even great artists have shaky hands at times. Even if the lines aren't pixelated, it's easy to get lines that are jagged and have a few bumps. A quick fix for this is to increase the "streamline" slider. This can be found within the settings of the brush you're using, which you can access by tapping on the brush. When you increase the "streamline" feature, you'll notice that your lines are more smooth.

If I'm working on large swaths of lines, I like to use the smudge tool to blend things. This won't work for crisp and clean outer lines, but it works wonders for smoothing our large chunks of pencil or color.
Alright, now that we've talked about all of the ways to avoid pixelation with Procreate, let's talk about why it happens in the first place and always will happen to some degree.
Why Does Pixelation Happen with Procreate?
Procreate is a raster-based program, which means that its lines and designs are created out of pixels. This is different from a program like Illustrator that creates vectors. For pixel-based programs, there's always a chance of pixelation if the canvas is too small or the design is zoomed in.
Your heart may have sunk when you read that there's a point where you will always see some pixelation. It's true, but it's true for newspapers and prints as well. It's true for anything that uses pixels.
If you want to avoid pixelation altogether, you can create vector images.
In fact, this is why a lot of designers like programs like Illustrator. You can scale them up or down without any distortion to the image.
Aside from Illustrator and other vector programs, a lot of the world is made out of pixels. If you're interested in digital drawing or design, it's just something you'll have to deal with. Luckily with the few simple tips we've talked about above, it won't be a problem when using Procreate.
How to Draw Pictures Without Fuzzy Lines
Source: https://adventureswithart.com/fix-pixelated-lines-procreate/
0 Response to "How to Draw Pictures Without Fuzzy Lines"
Post a Comment